Create new routes, modify existing ones, and retire expired routes.
Things to do:
- Create a new route
- Preview a route
- Edit a route
- Copy a route
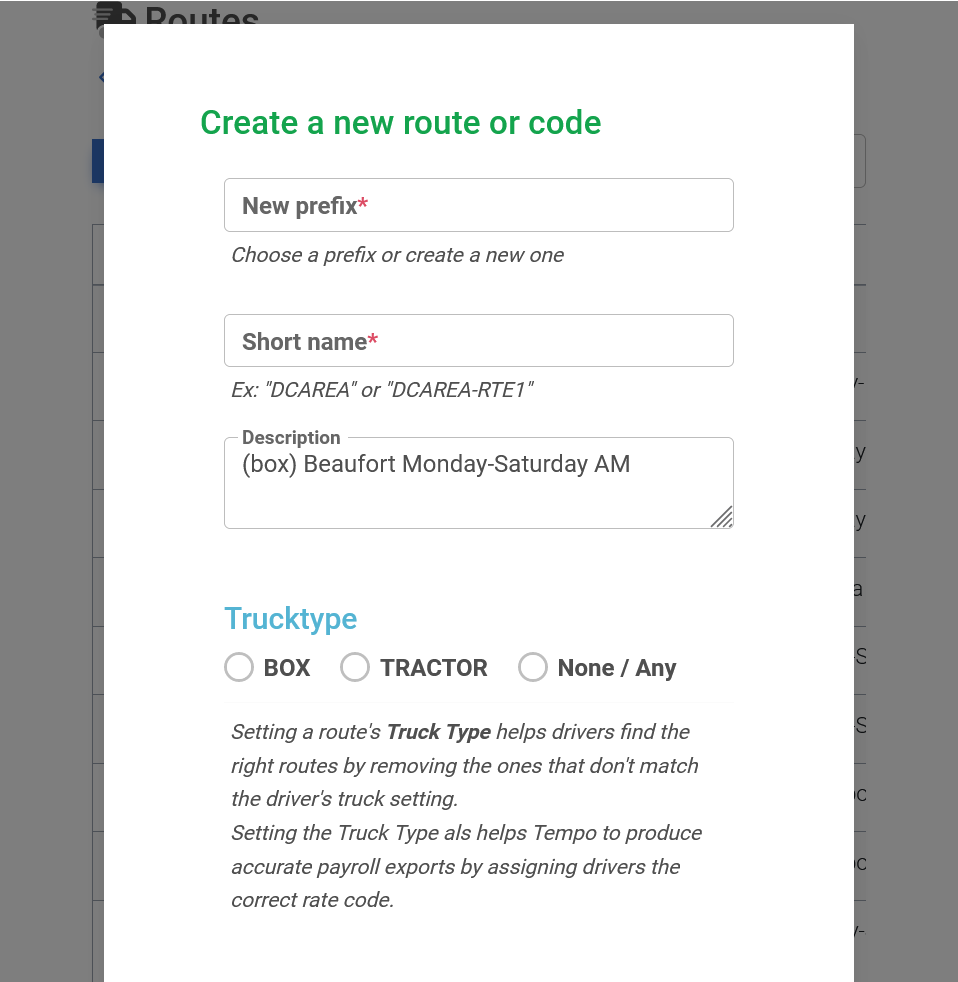
Step 1: Create new route

To create a new route, click or select the blue new route button at the top of the page. This will allow a popup window to appear allowing users to create a new route (all red starred items must be completed). The form will include:
- New prefix for the route these can be premade or a new one can be created.
- Choose a short name for the route
- Add a description for the route
- Select a truck type
- Optional defaults
- Availability settings
Step 2: Preview route information

To preview the route information, click or select the green out of the box arrow button to preview the route information, once selected a popup window will appear displaying the route information (i.e., route description, route availability, default hours, truck type, default truck number, and when the truck was last used).
From here locate the route information can be copied or edited
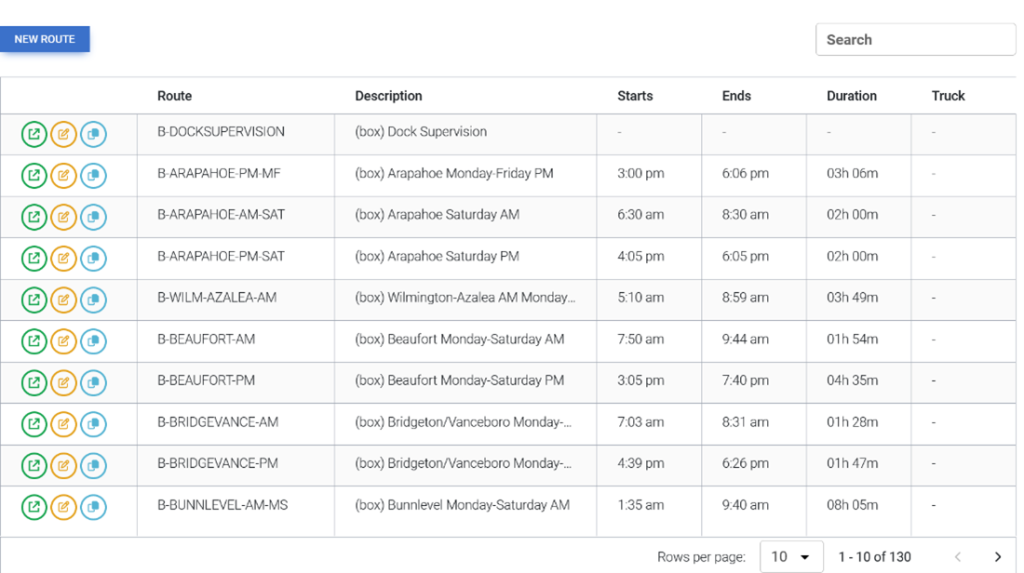
Step 3: Edit a route

To edit a route entry, select or click on the yellow pencil icon, a popup window will appear with the same form for new route entry. The top of the form will display editing as the title.

Step 4: Copy existing route

To copy the route information, click on the light blue squares the create a new code form which will appear to allow you to copy the code.